I blinked and suddenly the humble Fairy Bun was displaced by its glamorous American cousin, the Cup Cake. When I saw these first, I felt a tad bit intimidated as they were so stunningly iced and presented (and priced!). By comparison, the Fairy Bun looks ragged and home-made rather than designer conceived and created.
So what’s the difference? I googled each and found Fairy Buns defined as ‘a small individual sponge cake, usually with icing or other decoration.’ And Cup Cake? It was described as…‘a small cake designed for one person…’
What of the recipe? I had a look at a number of versions for each. The basic recipes are very similar except for the repetitive addition of vanilla essence to the Cup Cake batter. So methinks it’s all in the individualisation and presentation.

Ah – the humble Fairy Bun. It doesn’t matter what mix you use or how it is presented, it invariably looks homemade. Since the advent of the Cup Cake, however, it has been relegated to second place and eaten to extinction. Well, almost. I do encounter the odd ragged version at the Church Fete described ambitiously as a ‘Cup Cake’ but not at all in the same league.
Fairy Bun, Cup Cake – they are very different beasts. I am advocating the return of the Fairy Bun to centre stage and to the memory of so many people who made these with mums, daughters, sons, grandmothers in Irish kitchens throughout the world!
In this house, Fairy Buns reign supreme while the Cup Cake can visit – by appointment! For me, the Cup Cake can never displace the Fairy Bun as it carries none of the nostalgia. When I see the paper cake holders, I am back in my mother’s kitchen, sitting on the scruffy blue stool, watching her skilfully scoop cake mix off the spoon into the paper case with her (clean) little finger without upsetting the holder. And while they baked, there would be the ceremonial cleaning of the bowl and spoon – first by human tongue and then washing-up liquid and hot water. Serious discussion on presentation and filling would follow. Yes, the decorating stage would be messing, it would be ruthless but the end result was ours. The Teen and I share similar memories but I must admit that her skill in Fairy Bun making and decorating now surpasses mine.
With my mum, we made the basic recipe but often jazzed it up. We might add chocolate drinking powder to all the mix or on occasions to half the mix. Doing this meant we could make marbled sponge with a rather yummy two tone flavour. As a child, I loved experimenting with a variety of food colourings to create more marbled effects but, being heavy handed with the bottle, often ended up with navy blue or scarlet red sponge. Worse still, the end product might resemble coloured ‘Marla’ all rolled in together.[1]
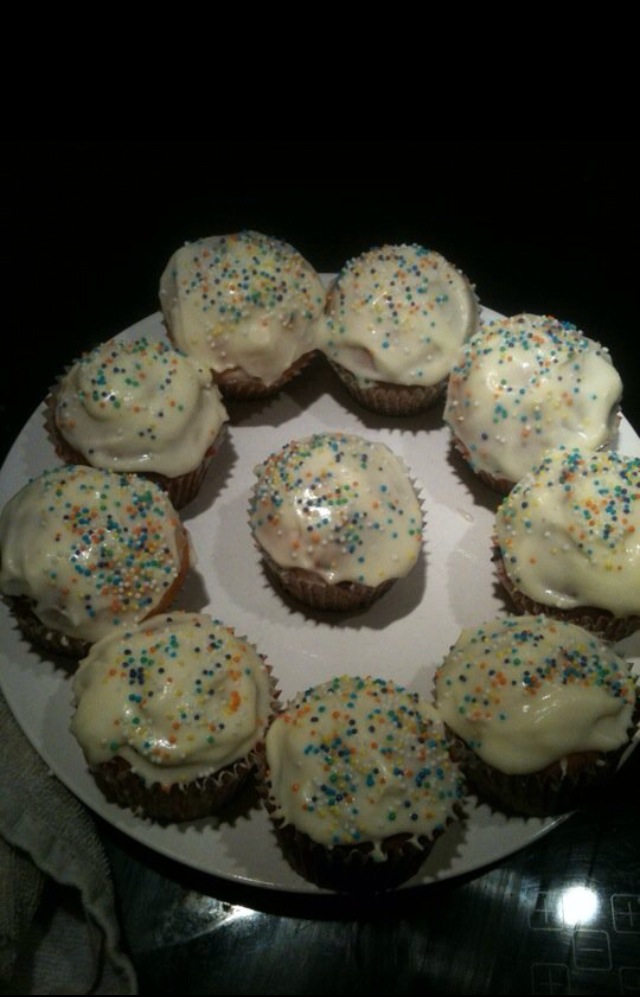
Here’s the basic recipe used in this kitchens of this family with a few samples of how we dice and ice them.
Basic recipe
(makes 6-8)
Ingredients
2 ounces margarine or unsalted butter, softened
2 ounces castor sugar
1 egg
3 ounces of self-raising flour, sifted
Method
1. Heat the oven at 190F.
2. Prepare a muffin tin with paper cake cases.
3. Blend the butter and sugar together until pale.
4. Beat the egg and add in stages to butter/sugar mix until combined.
5. Fold in the sifted flour with a metal spoon – in three stages.
6. Put about a dessert spoon of mixture into each case.
7. Bake in the middle of the oven for 10 minutes or until risen.
8. Insert a skewer into the bun and if it comes away clean, the bun is cooked.
9. When baked, stand upright and cool on a wire rack.
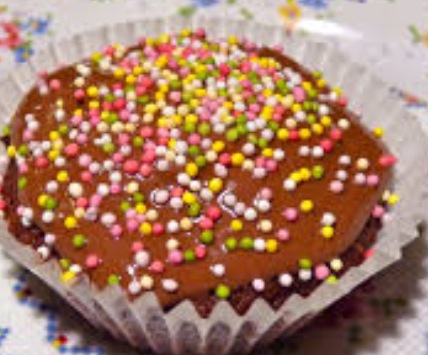
Chocolate
Sometimes we take out a tablespoon of flour and replace it with a tablespoon of Cocoa or drinking chocolate (the Teen always throws in a tad bit more believing chocolate heals all ailments!).
Marbled
Feeling a tad bit more creative, I make double the mixture. In one bowl, I add food colouring or drinking chocolate. Putting alternative spoons from each bowl, I fill up each cake case. When baked, these have a lovely mottled effect and/or a cross of flavours.
Chocolate butter icing
This house agrees that the best way to serve chocolate Fairy Buns is covered in chocolate butter icing. I make this by combining into a smooth paste 2 ounces of sifted icing sugar, 1 ounce of butter, 1/2 ounce of drinking chocolate and one tablespoon of cold milk. Spread the mix lavishly all over the top of freshly baked buns. The Teen often skips this stage, preferring to slather the buns in Nutella!
Butterfly (traditional or chocolate)
If the above sound very conservative, you can simply decapitate the humble Fairy Bun! Take the piece and carefully cut in half. The traditional version adds a small spoonful of raspberry jam and then a small spoonful of slightly sweetened, fresh whipped cream on top before replacing the cut pieces. These should be positioned at angles to give the look of butterfly wings.
We have also been known to ditch the jam and cream, replacing it with chocolate butter icing or Nutella.
Jam and coconut
A personal favourite is warmed raspberry jam spread on the top. When coated, the bun is rolled on a plate of desiccated coconut until it is completely covered.
Nana Margaret’s
No discussion about Fairy Buns in our home would be complete without mentioning my aunt’s version. It is so delightful to see the reaction as she opens the cake tin when her grandchildren pop by. ‘Nana Margaret’s’ are the best – ever. She dips the top into melted chocolate and when cooling, adds coloured sprinkles over the top. Delightful and nostalgic – all contained in one cake case! Delish.
[1] Mala/Marla is the Irish word for plastercine, a feature of Primary School classrooms.
