Bread and Butter Pudding

Aaaaahhhhh! “Womb Food”!

There comes a time in everybody’s week when they forgo the fancy food, healthy options and the spicy dishes and want to climb back into their youth.

Throughout my twenties, I had many moments like this. Surrounded by excellent Indian restaurants, Pizzerias, health food stores and amazing shops, I simply wanted my food to envelope me and make me feel all better after a long day at work.

I took to cooking such culinary delights as Chips, Beans and Sausages only to discover my flatmate eagerly ogling my plate so I cooked even more Chips, Beans and Sausages. Then the flat downstairs heard and they were in line to be fed. Our network of pals heard and people started calling by when I was cooking what affectionately became known as “Womb Food”.

The menu expanded to cope with growing need and visitors. Troughs of homemade Shepard’s Pie (always served with Baked Beans) were devoured by the masses. Piping hot bowls of Macaroni Cheese were also well received. Soft, fresh, batch bread filled with hot sausages (red sauce for the girls, brown sauce for the boys) was a Saturday morning favourite.

As the menu expanded, so too did a number of waist bands. Desserts started making an appearance. There was vanilla ice cream sprinkled with Flake chocolate. Viennetta drowned in shop bought chocolate sauce. Or my homemade Bread and Butter Pudding which I doubt every hit the sides of some people’s mouths, it was devoured so quickly.

When the visitors left, and we felt in need of extra culinary cuddles, myself and the flatmate would curl up in front of our nearly obsolete black and white television, PJs on with steaming hot mugs of Hot Chocolate and Cadbury Flakes to dip in.

The Bread and Butter Pudding was always a big hit. I never got why. I was simply replicating a taste from my youth but everyone said that there was a bit of a twist to it. Must have been the grated lemon rind I sprinkled in between the layers…


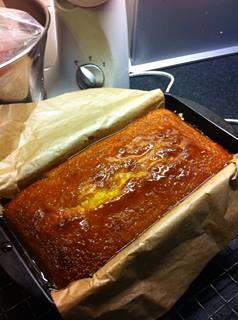
Bread and Butter Pudding from Number 29

Ingredients
12-14 slices of white bread (day old is better)
Oodles of soft butter (margarine is a poor substitute!)
4 large eggs
1 pint full fat milk (or can use ¾ pint milk and ¼ cream)
3 ounces sugar
2 ounces good quality sultanas (either use dry or soaked in a little apple juice beforehand)
Grated rind of large lemon

Method
1. Use an oval Pyrex dish about 12 inches by 8 inches
2. Place all ingredients and a damp cloth on the counter beside you because this gets mighty messy!
3. Butter the inside of the dish.
4. Cut the crusts off the bread. Cut the slices into triangles and butter each side
5. Cover the bottom of the dish with these bread triangles
6. Sprinkle with some sultanas and a pinch of lemon rind
7. Add another layer of triangles, sprinkle with more sultanas and lemon rind, etc.
8. On the top layer, arrange the pieces in a nice pattern. Some like to sprinkle sultanas on the top but I think they simply get burnt so I keep all the fruit under cover
9. Now wipe clean your buttery hands in that damp cloth!
10. In a bowl, whisk the eggs, milk and sugar together until the mix is frothy and the sugar dissolved
11. Pour this mixture liberally over the bread to ensure it is fully immersed in the liquid
12. Place in the fridge for about an hour to allow it to absorb. It can be left longer if you want to prepare it in advance
13. Preheat the oven to 180 degrees
14. Place in the middle of the oven and bake for about 30 minutes until the top is brown and there is no visible liquid
15. At the 15 minute mark, I sometimes take it out and sprinkle some cinnamon sugar on the top
16. Serve with whipped cream or vanilla ice cream.

Standard
Baking and stuff, Family Stories and Food, Greta of the Griddle, Griddle Bread

Greta of the Griddle

20150226_183334

My Godparents were posh. They looked posh, spoke posh, lived posh and ate posh.

Born slightly after the turn of the twentieth century, Mervyn was the son of a doctor who lived and had Rooms on the rather salubrious, leafy, Merrion Square in Dublin’s centre. He and his two sisters were attended to by ‘Staff’, went to the best of schools, enjoyed the Square as their garden and had pet monkeys which, he assured me, were quite common in the Dublin of that time.

Greta was more exotic. Born and raised in Canada, she came with her family to Ireland in her teens. I would meet her later in her life, when she had grown to resemble in face and mannerisms the wonderful English actress, Margaret Rutherford. A marvellous cook, Greta delivered delicious meals and baked like a demon for charities and church events.  Some of the food, like her accent, was a throwback to the British Empire – curried eggs and Kedigree – foods we marvelled at but remained reluctant to taste (put off by the odd colour and spicy smell).

And in between all the posh and foreign nosh, she would take out a griddle. Seeing Greta with all her fine manners, jewellry and clothes cook on a griddle just seemed plain wrong. Even as a child, I felt this implement was best suited to an open fire in a cottage than on a top of the market, gas stove, in their art deco home. And so, I would watch as she cooked Griddle Bread on that contraption until done. It was always delicious but I doubt those who savoured it, would ever believe that Greta cooked it herself on a griddle!

The tripod griddle would be placed on the stove top with the gas on a medium high to heat the cast iron base. She would make the dough and…eh…then…Greta would griddle.

Ingredients
1lb flour
1.5 ounces sugar
Pinch of salt
1 teaspoon of baking powder
1.5 ounces of melted butter
1/3 pint of full fat milk
1 large egg

Method
1. Combine the dry ingredients
2. Combine the wet ingredients until one liquid
3. Add the wet to the dry and mix thoroughly
4. On a lightly floured board, shape the mix into a cake shape with a flat top
5. Cook on the hot griddle – about 7 minutes each side
6. When cooked, it will have texture of a very large English muffin,

Cutting it into triangles, Greta would divide each again into two. She would spread one side with butter and slather the other with her homemade jam. As I would sit on a stool at her breakfast counter, eating this warm delight, warm butter/jam concoction dripping off the bread and onto my fingers, I would watch as she cleaned the kitchen. The last thing to do was to rub a light coating of oil into the griddle to stop it from rusting before she put it away. And with the kitchen tidied, the griddle would be no more…

bread

Standard
Baking and stuff, Baking and the Delights of Being a Researcher, Dark Chocolate Cake, Stuff and Nonsense

Baking and the Delights of Being a Researcher…

Through the years, I have worked on quite an array of projects and campaigns. In the late 1990s, I spent many months in a darkened room, flicking through decades of Irish newspapers stored on Microfiche. Ah, those were the days when researcher-friendly technology had yet to arrive – working through pages so awkwardly photographed that you stand on your head and still be unable to read them!

While I scoured the paper for gruesome information to prepare a client for the Tobacco Trials, I did so in-between hordes of Americans looking through Church Records for their Irish ancestors. The Librarian’s knuckles would whiten as he gripped the Information Desk, listening to yet another visitor reveal enthusiastically how their great, great, great grandfather came from ‘Ire-land’ and while they didn’t know the county, they were sure the surname was ‘Murphy’.

As they searched the records, their roars cracked the expected silence of the library and their delight met with scowls from the rest of us. One group was particularly raucous. I was about to lean over to ask them to pipe down until I spotted what they were looking at – my own family tree. Not being in the mood to reclaim lost relatives, I returned to my work and simply carried on…

Spending up to seven hours a day looking at Microfiche, my mind would take to wandering. I delighted in reading ads for jobs clearly stating a higher rate of pay for men over women doing the same job. I read reports of police searches for the spy, Guy Burgess, while I knew from history he was already in Russia by this time. As I covered year after year of newspapers, I was particularly stunned to learn of the overwhelming popularity of an entertainer called the “Chocolate Covered Coon” – a name which now makes the Black and White Minstrels seem almost respectable.[1] I would emerge at the end of the day into daylight: notebooks full, copies ordered with bleary eyes and a mindful of facts which were alarmingly out-of-date if I bumped into a pal who asked the inevitable question “Any news?”


I scanned through the Women’s pages too and collected recipes from bygone years. I found this one in The Irish Press of 3 May, 1962 and tried it out on the teen. It’s low flour content and deep chocolate flavour met with instant approval even if it was pronounced ‘very rich.’


Ingredients
3 eggs, separated
4 ounces of bitter, dark, chocolate*
4 ounces unsalted butter
4 ounces castor sugar
2 ounces ground almonds
1.5 ounces plain flour

*It is essential to use bitter, dark, chocolate in this cake

Method
1. Beat the butter and sugar until it is pale
2. Melt the chocolate in a bowl over a pan of water
3. When melted, allow it to cool down
4. Whip the egg whites until stiff and set aside
5. Combine thoroughly the butter and sugar mixture with the chocolate, almonds, flour and yolks of the eggs
6. Fold in the stiff whisked egg whites
7. Place the mixture into one greased sandwich tin
8. Cook in a non-Fan oven at 180 for about 45 minutes (place a little tin foil on top if cake top looks as if it is cooking too quickly)
9. Insert skewer into the centre to ensure the cake is cooked – if it comes out clean, it is
10. Cool on a wire rack
11. Serve with whipped cream.

[1] http://www.bigredbook.info/g_h_elliott.html

Standard
Baking and stuff, Fairy Buns, Let's Hear it for Fairy Buns!

Let’s hear it for Fairy Buns!  

photo 2


I blinked and suddenly the humble Fairy Bun was displaced by its glamorous American cousin, the Cup Cake. When I saw these first, I felt a tad bit intimidated as they were so stunningly iced and presented (and priced!). By comparison, the Fairy Bun looks ragged and home-made rather than designer conceived and created.

So what’s the difference? I googled each and found Fairy Buns defined as ‘a small individual sponge cake, usually with icing or other decoration.’ And Cup Cake? It was described as…‘a small cake designed for one person…’

 What of the recipe? I had a look at a number of versions for each. The basic recipes are very similar except for the repetitive addition of vanilla essence to the Cup Cake batter. So methinks it’s all in the individualisation and presentation.


photo 3


Ah – the humble Fairy Bun. It doesn’t matter what mix you use or how it is presented, it invariably looks homemade. Since the advent of the Cup Cake, however, it has been relegated to second place and eaten to extinction. Well, almost. I do encounter the odd ragged version at the Church Fete described ambitiously as a ‘Cup Cake’ but not at all in the same league.

Fairy Bun, Cup Cake – they are very different beasts. I am advocating the return of the Fairy Bun to centre stage and to the memory of so many people who made these with mums, daughters, sons, grandmothers in Irish kitchens throughout the world!

In this house, Fairy Buns reign supreme while the Cup Cake can visit – by appointment! For me, the Cup Cake can never displace the Fairy Bun as it carries none of the nostalgia. When I see the paper cake holders, I am back in my mother’s kitchen, sitting on the scruffy blue stool, watching her skilfully scoop cake mix off the spoon into the paper case with her (clean) little finger without upsetting the holder. And while they baked, there would be the ceremonial cleaning of the bowl and spoon – first by human tongue and then washing-up liquid and hot water. Serious discussion on presentation and filling would follow. Yes, the decorating stage would be messing, it would be ruthless but the end result was ours. The Teen and I share similar memories but I must admit that her skill in Fairy Bun making and decorating now surpasses mine.

With my mum, we made the basic recipe but often jazzed it up. We might add chocolate drinking powder to all the mix or on occasions to half the mix. Doing this meant we could make marbled sponge with a rather yummy two tone flavour. As a child, I loved experimenting with a variety of food colourings to create more marbled effects but, being heavy handed with the bottle, often ended up with navy blue or scarlet red sponge. Worse still, the end product might resemble coloured ‘Marla’ all rolled in together.[1]

Here’s the basic recipe used in this kitchens of this family with a few samples of how we dice and ice them.


Basic recipe
(makes 6-8)
Ingredients
2 ounces margarine or unsalted butter, softened
2 ounces castor sugar
1 egg
3 ounces of self-raising flour, sifted

Method
1. Heat the oven at 190F.
2. Prepare a muffin tin with paper cake cases.
3. Blend the butter and sugar together until pale.
4. Beat the egg and add in stages to butter/sugar mix until combined.
5. Fold in the sifted flour with a metal spoon – in three stages.
6. Put about a dessert spoon of mixture into each case.
7. Bake in the middle of the oven for 10 minutes or until risen.
8. Insert a skewer into the bun and if it comes away clean, the bun is cooked.
9. When baked, stand upright and cool on a wire rack.


Chocolate
Sometimes we take out a tablespoon of flour and replace it with a tablespoon of Cocoa or drinking chocolate (the Teen always throws in a tad bit more believing chocolate heals all ailments!).

Marbled
Feeling a tad bit more creative, I make double the mixture. In one bowl, I add food colouring or drinking chocolate. Putting alternative spoons from each bowl, I fill up each cake case. When baked, these have a lovely mottled effect and/or a cross of flavours.

Chocolate butter icing
This house agrees that the best way to serve chocolate Fairy Buns is covered in chocolate butter icing. I make this by combining into a smooth paste 2 ounces of sifted icing sugar, 1 ounce of butter, 1/2 ounce of drinking chocolate and one tablespoon of cold milk. Spread the mix lavishly all over the top of freshly baked buns. The Teen often skips this stage, preferring to slather the buns in Nutella!

Butterfly (traditional or chocolate)
If the above sound very conservative, you can simply decapitate the humble Fairy Bun! Take the piece and carefully cut in half. The traditional version adds a small spoonful of raspberry jam and then a small spoonful of slightly sweetened, fresh whipped cream on top before replacing the cut pieces. These should be positioned at angles to give the look of butterfly wings.

We have also been known to ditch the jam and cream, replacing it with chocolate butter icing or Nutella.

Jam and coconut
A personal favourite is warmed raspberry jam spread on the top. When coated, the bun is rolled on a plate of desiccated coconut until it is completely covered.

Nana Margaret’s
No discussion about Fairy Buns in our home would be complete without mentioning my aunt’s version. It is so delightful to see the reaction as she opens the cake tin when her grandchildren pop by. ‘Nana Margaret’s’ are the best – ever. She dips the top into melted chocolate and when cooling, adds coloured sprinkles over the top. Delightful and nostalgic – all contained in one cake case! Delish.


 photo (2)


[1] Mala/Marla is the Irish word for plastercine, a feature of Primary School classrooms.

Standard
Baking and stuff, Jewish Orange and Almond Cake, Uncategorized

The Love-Hate Cake

1479417_10202552057460632_112988140_n


I love oranges – always have, always will. Unfortunately, that does not extend to marmalade which is a taste I cannot endure in any shape or form. The Teen, however, loves it – created by an early affinity with Jaffa Cakes. This cake therefore appeals to some palates but alas, not all.

This is a cake of many dimensions. It is a cake for marmalade lovers as it has an intense orangey taste. It is a flour free/gluten free cake. Although I cannot taste the final product, it is also a cake I enjoy making – particularly, the aroma of orange that wafts through the house as the oranges are cooking.

Where did I find this? I have been asked this question on a number of occasions. In 2000,  I was carrying out research for a client on old newspapers. I found this in an edition of The Irish Press from the 1950s and couldn’t resist jotting it down.

Jewish Orange and Almond Cake

Ingredients
2 large oranges
6 eggs
9 ounces castor sugar
1 teaspoon baking powder
9 ounces of ground almonds

Method
1. Gently boil the two oranges for about two hours
2. Cool and pulp
3. Blend the eggs, sugar and baking powder until light, thick and pale
4. Add the ground almonds
5. Add the pulped orange
6. Turn into a cake tin
7. Bake in a non-Fan oven at 190 for about one hour. The cake is baked when a skewer inserted into the centre of the cake comes away clean.

Standard
Baking and stuff, Orange Drizzle Cake

Necessity is indeed the Mother of Invention…

Image

I get a phone call and I am still in my PJs. Saturday and my lovely pals, Laura and David, are on their way over with a gift. I’m the type of gal who can’t take without reciprocating. I have an hour… I know what. I’ll bake them a cake to take home. Problem is, I have ingredients for a madeira cake but little else. There are a handful of oranges in the bowl. Eureka! I’ll make an Orange Drizzle Cake.

I set to work and tasting along the way, it all seems fine. It is baking so when my pals arrive, they are greeted with the aroma of sweet cake. I take it out of the oven, add the warm orange syrup and let cool. They seem delighted and text later to say it’s a hit!

While I love the zing of lemons, this really is a worthwhile alternative. I add the juice of half an orange to the zest, let it sit before adding to the cake mix because I like a more, intense, orangey flavour. As with all cakes and food, it is simply a case of matching your food to your palate…

Orange drizzle cake

Ingredients

Cake
4 large eggs, beaten
8 ounces unsalted butter
8 ounces self-raising flour, sifted
8 ounces castor sugar
Zest of one orange
Juice of half orange or a teaspoon of orange essence (optional)

Syrup
3.5 ounces of icing sugar
Juice of one orange

Method
1. Pre-heat oven to 180 C
2. Prepare a loaf tin by lining with greaseproof paper (tin should be about 8 x 21 cm)
3. Blend the butter and sugar until pale
4. Add in the beaten eggs, a bit at a time, combining as you go
5. Add in the flour in three stages
6. Add in the zest of the orange
7. Add in the juice or essence
8. When combined, fold into the tin and level out the top
9. Bake in the centre of the oven for 45-50 minutes (the cake is done when the skewer comes away clean and the cake is pulling away from the sides of the tin)
10. As the cake is cooling, melt the icing sugar with the orange juice over a low heat until it becomes a syrup
11. Pierce the top of the warm cake with the skewer randomly
12. Pour over the warm syrup onto the cake
13. Let the cake cool in the tin
14. Serve with cream and raspberries or simply a big mug of coffee!

** See here for Lime Drizzle Cake: https://teeninattic.com/2018/12/13/lime-drizzle-cake/

Standard
Baking and stuff, Texas Chocolate Slab Cake

What to bring? What to bring? The question asked every Christmas!

Image

We’re building up to the Christmas season here. At this time of year, we all come together to eat dinner with one another. I am blessed to have an amazing family who the Teen and I delight in spending the day with.

The food will be spectacular as everyone brings their contribution. There will be the usual amount of desserts – about 10! My cousin’s husband particularly enjoys chocolate cake. Last year, I made my Chocolate Fudge cake which kept him happy for a few days. He likes to microwave it, douse it in custard and devour! The Teen thinks that is too much effort and eats her’s unadorned.

This year, I am making a Texas Chocolate Slab Cake. Years ago, I saw my pal, Brid, make this. I never got to sample it as the cat decided that the warm cake was a perfect place to sleep as the tray lay cooling on top of the refrigerator. I left with the recipe but no idea of the taste as I declined a piece of fur covered chocolate cake.

Eventually, I tried this recipe and it wowed on a number of levels. It is a big cake – and I mean BIG! I cut it into about 15 good sized portions. It is a deceptively rich cake so it has a hint of decadence. It is a surprisingly moist cake, tasting even better the next day. And, with the different processes, I actually had time to complete the washing-up while, for example, the butter and milk mixture was melting! What a welcome occasion, to finish a cake and not have to face into a sink full of pots and bowls – Bliss!


Texas Chocolate Slab Cake

Ingredients

Sponge
4 fluid ounces buttermilk
2 large eggs
1lb castor sugar
1lb plain flour
1 teaspoon baking powder
½ teaspoon salt
8 ounces unsalted butter or margarine
2 tablespoons oil (vegetable or sunflower)
8 fluid ounces water
6 tablespoons cocoa powder (not drinking chocolate)
1 teaspoon vanilla essence

Icing
4 ounces unsalted butter
6 tablespoons milk
4 tablespoons cocoa powder (not drinking chocolate)
1lb icing sugar, sifted
8 ounces toasted pecan nuts, chopped (optional)

Method
1. Pre-heat oven to 170 degrees (non-fan assisted)
2. Grease a deep tin or line with baking parchment/greaseproof paper (about 9” x 12”)
3. Into a large bowl, place sugar, flour, baking powder, salt and mix together until fully combined.
4. Make a well in the centre of the dry ingredients
5. Whisk the eggs and buttermilk together and leave aside*
6. In a saucepan, gently melt the butter, oil and water. Bring up to boiling point but do not let boil
7. Remove from the heat. Using a small whisk, mix in the cocoa powder until completely combined
8. Add in the vanilla essence
9. Add this mixture to the dry ingredients and mix thoroughly
10. Add in the milk and egg mix and stir well.
11. Pour this into the pan
12. Bake at the centre of the oven for 30-35 minutes
13. When the cake is nearly ready, make the frosting as it cannot be allowed to set. (Test the cake to make sure it is nearly baked before making the icing)
14. In a saucepan, melt the butter and milk. Bring up to boiling point but do not let boil
15. Remove from heat and using a small whisk, mix in the cocoa powder until completely combined
16. Whisk in icing sugar gently to make sure there are no lumps. As it thickens, use a wooden spoon. If it thickens too quickly, return to the heat and stir continuously (gently) until it becomes less thick. If necessary, add a little milk to thin it out
17. Mix icing until it is shiny
18. Remove sponge from oven. It is cooked when pierced with a skewer and it comes away clean
19. Pierce the sponge all over
20. Quickly spread the icing all over the hot sponge, using a spatula to ensure it is evenly distributed
21. If including pecan nuts, sprinkle over the cake at this point
22. Leave the cake to cool completely in the tin before slicing (but it is rather decadent when still a little warm!)**
23. It is perfect to make the day before.

* A small hand-held whisk should be used. An electric whisk should not be used, especially for the hot liquids.

** If being this naughty, suggest some unsweetened whipped cream or a quenelle of vanilla ice cream.

Standard